
SimTrim: Trim Wheel Freeware for Microsoft Flight Simulator
Synchronising your analog elevator trim wheel
SimTrim is a desktop application designed for Microsoft Flight Simulator that synchronizes your analog elevator trim wheel with the virtual trim controls, effectively eliminating the “snapping” issue experienced after takeoff or when disengaging autopilot. This tool allows for precise trim adjustments, enhancing your control over aircraft performance during flight.
The following video from Simhanger does an excellent job of showing how SimTrim can work with both analog and digital elevator trim wheels to produce a more accurate and precise flight experience:
Latest freeware download, or get older versions from the resources page.
Installation and usage instructions can be found here.
What is SimTrim and How Does it Work?
Do you have a nice analog trim wheel and want to use it in flight simulator? Don’t feel it’s an option because you get an obtrusive “snapping” problem just after takeoff or when autopilot is switched off? SimTrim is designed to eliminate this problem by synchronizing your physical trim wheel with the virtual one. So, no more “snapping” problem; you can finally use your accurate and precise analog trim wheel as intended.
Regarding synchronicity, rather than sending controller inputs directly to the flight simulator, SimTrim acts as a middleman, taking those inputs, performing calculations, and then passing on that information to the running flight sim.

New features: On-ground rudder control and digital trim wheel support
The focus of SimTrim has always been on analog trim wheels, but as of version 1.3, there is support for digital trim wheels, such as the popular wheel on the Honeycomb Bravo throttle quadrant. Now, you can set any value sent to the running sim you like, effectively letting you change your digital trim wheel sensitivity to your own preference.
Also introduced in 1.3 is the on-ground rudder control option. This lets you steer with your yoke or joystick to taxi/take off/land without rudder pedals. When you take off, the rudder is disabled automatically, meaning you can continue to fly as usual with only your ailerons controlled by your yoke/joystick again. Land, and rudder control is enabled again automatically. This is different from the rudder assist option in MSFS, which also aids you in countering crosswind and p-factor and helps keep you level in flight.
SimTrim is a separate application running side by side with MSFS, so changes and adjustments to trim and rudder in SimTrim can be made easily mid-flight. Is the trim wheel not sensitive enough? No problem; just move the sensitivity slider or change the button trim values until you are happy with the result, all without escaping or pausing your flight.
SimTrim was designed for msfs2020, but I have recently tested it with msfs2024 and can confirm it works flawlessly. See here for quick start guides on how to get any of these options set up.
Exploring Other Popular Mods for Microsoft Flight Simulator
Consider exploring enhancements that improve your cockpit environment, such as realistic gauges or custom cockpit layouts. Some of the biggest and best names in flight sim mods include flightsim.to, flyawaysimulation.com, msfsaddons.com, simviation.com.
To use the analog features of SimTrim, you will need a controller with an analog axis to use as a trim wheel or rudder, of course, and you may already have and use such a controller. You can also use a digital trim wheel or any controller with buttons if you want to use digital trimming.
For example the Honeycomb Bravo has a digital wheel, whereas the Turtle Beach Velocity One Flightstick has a thumb wheel that can be set as analog or digital. There are also dedicated trim wheels from Flight Velocity or Desktop Pilot.
I have also made my own excellent DIY 3D-printed trim wheel (see Trim Wheel Pro (TWP)) as a superb device for trimming in flight simulator. Still, I realize that the “snapping” problem cannot be solved through hardware alone, which is why SimTrim was born.
I have to say that the combination of my own TWP and the SimTrim software is second to none when it comes to trimming in flight simulator.
How to Install SimTrim in Microsoft Flight Simulator
Click the link to the SimTrim Software on this site’s resources page. Once downloaded, click the MSI file to begin the installation and follow the on-screen instructions.
Note: If Windows SmartScreen pops up, you can safely ignore this, as the file has been signed, verified and scanned. In this case, click ‘more info’ and then ‘Run Anyway’.
Another option is to download SimTrim via the flightsim.to page. This method shows none of the SmartScreen warnings, so if this worries you, download from here.
Quick Setup Guides
I have tried to make everything related to the UI as simple and user-friendly as possible because I don’t want you to spend time figuring out how to use it. Also, the simpler it is to use, the less documentation is required, and I would rather spend my time writing and updating the code than writing lengthy explanations.
That said, I have written a short guide to getting started for each main features to clarify any confusion. If I have missed anything or made a mistake, please let me know on Discord, and I will be happy to make the changes.
Analog Trimming
Let’s say, for example, you want to synchronize the analog thumb wheel on the velocity one flight stick to flight sim and remove any issues with “snapping,” as discussed…
- An important first step in using SimTrim is to make sure any elevator trim axis control option in the flight sim has been cleared for whatever control you want to use:

This is because SimTrim will send elevator trim information whenever you turn your wheel, and you don’t want the flight simulator to do the same directly and simultaneously, as this would cause hiccups.

- In the flight simulator control options, select your controller along the top
- Search for ‘Elevator axis’ in the search box on the left
- If an axis is assigned to the elevator axis, Click it
- Click ‘Clear Current Input’
- Click ‘Validate’
- ‘Apply and Save’

- When loading SimTrim, you should see each controller detected on your system listed in the tabs at the top. The main view will display every analog axis and every button on the selected controller. Selected is the “VelocityOne Flightstick”.
- If we rotate the thumbwheel physically, we should be able to see which of the horizontal bars is changing. For my V1 flightstick it is the bar in the DIAL section.
- Click the “Trim” radio button within the DIAL section, and that’s it. Your thumbwheel should now be synched with flight sim.It doesn’t matter when you click it, either. It makes no difference before or during a running session; your trim wheel is synched either way. There is no need to shut down and restart the sim before changes occur.
- If the trim sensitivity is not to your liking, you can drag the slider up and down until it feels right. You can also change the direction of the trim if needed with the checkbox. All settings will take effect instantly mid-flight, and all settings are saved and loaded on startup automatically so that you do not need to change them each time.
Testing

The easiest way to check that the trim is working is to focus on the trim wheel in the cockpit and rotate the physical wheel back and forth. You should observe the cockpit wheel moving as expected.
If you drag the wheel with your mouse so that the indicator is in a different place than before and then move your physical wheel, you should observe the indicator behaving properly and not snapping back to its original place, as would be the case without SimTrim.
Digital Trimming
I have always said that SimTrim only works with analog trim wheels and that I wouldn’t add support for digital wheels. For a few reasons, I changed my mind, and as of version 1.3, basic support for digital trim wheels has been added.
One such popular trim wheel is the one on the Honeycomb Bravo, so I shall use that as an example here.
- As with the analog trim wheel, we first need to clear the digital buttons from the msfs control options:

“elevator trim up” and “elevator trim down” need clearing. As with the analog instructions before, click on and “Clear current input” for both these controls:

- Run SimTrim and select the “Bravo throttle Quadrant” tab. You should see something like this:

- As the Bravo trim wheel is digital, we need to know which buttons correspond to its rotation. We should see buttons 22 and 23 flash as we rotate the wheel. We want to give it a number to send to the fight sim on each flash/pulse.
- Click on button 23, and you should see a popup asking for a number:

Enter 0.0004 in the input box. This is the angle in radians to increase/decrease the elevator trim on each pulse of the button, and it should be a very small decimal number. Repeat the same steps for button 22, but enter -0.0004 as the value this time.
These values should be changed on the fly to suit.

- When done, you should see something like the above picture. Buttons 22 and 23 now have a green background to indicate that they have trim values assigned to them. Of course, you can click those buttons and change their values at any point.
Testing
We can check that the trim is working in exactly the same way we did for the analog trim: look directly at the trim wheel in the cockpit and rotate the Bravo wheel to see if the pitch changes as expected.
To fine-tune the sensitivity of the Bravo wheel in flight, we can look forward in the cockpit as normal and rotate the wheel. If the pitch changes too much or too little, we should click the buttons in SimTrim and change the values slightly until we are happy.
On-Ground Rudder Control
If you can’t use or don’t have rudder pedals but still want to steer and taxi while the airplane is on the ground, you can use SimTrim’s taxi feature. With this option enabled, you can use the rudder/yoke to steer on the ground. Once in the air, the rudder is disabled for this axis.
You will not get assistance fighting crosswind or p-factor on takeoff or after landing, as you will be doing that yourself. This is a good thing, in my opinion, and you can keep one hand on the yoke/joystick while the other is on the throttle.
I will use my Honeycomb Alpha yoke for this example, but you can, of course, use any joystick or whatever you regularly use for basic roll and pitch control in flight simulator.
- Load SimTrim and select “Alpha Flight Controls”:

- The x-axis is most likely assigned as aileron controls in msfs and we still want aileron control, so don’t change this in msfs.
- To enable on-ground rudder control on the same axis as the ailerons, just select the Taxi radio button. That’s it!
Testing
To test that all is working, load the flight sim and jump into the cockpit. Head to an external view and turn the yoke left or right:

You should see the rudder deflecting as you turn the yoke. After takeoff, the rudder will be disabled again, and control returns to the ailerons only. After landing, the rudder is enabled on the x-axis again.
Profiles: How to set up in SimTrim
You can now have different settings applied for different aircraft / different types. So, for example, if you wanted your elevator trim sensitivity slightly increased for a certain aircraft, you can do that with a new profile and make the necessary sensitivity changes. When you need to return to the previous settings, you just need to activate the appropriate profile.
The most important and perhaps not-so-obvious point with profiles is… Any changes you make to the button, hats or analogue axes will always be applied and automatically saved to the active profile.
Activating a Profile
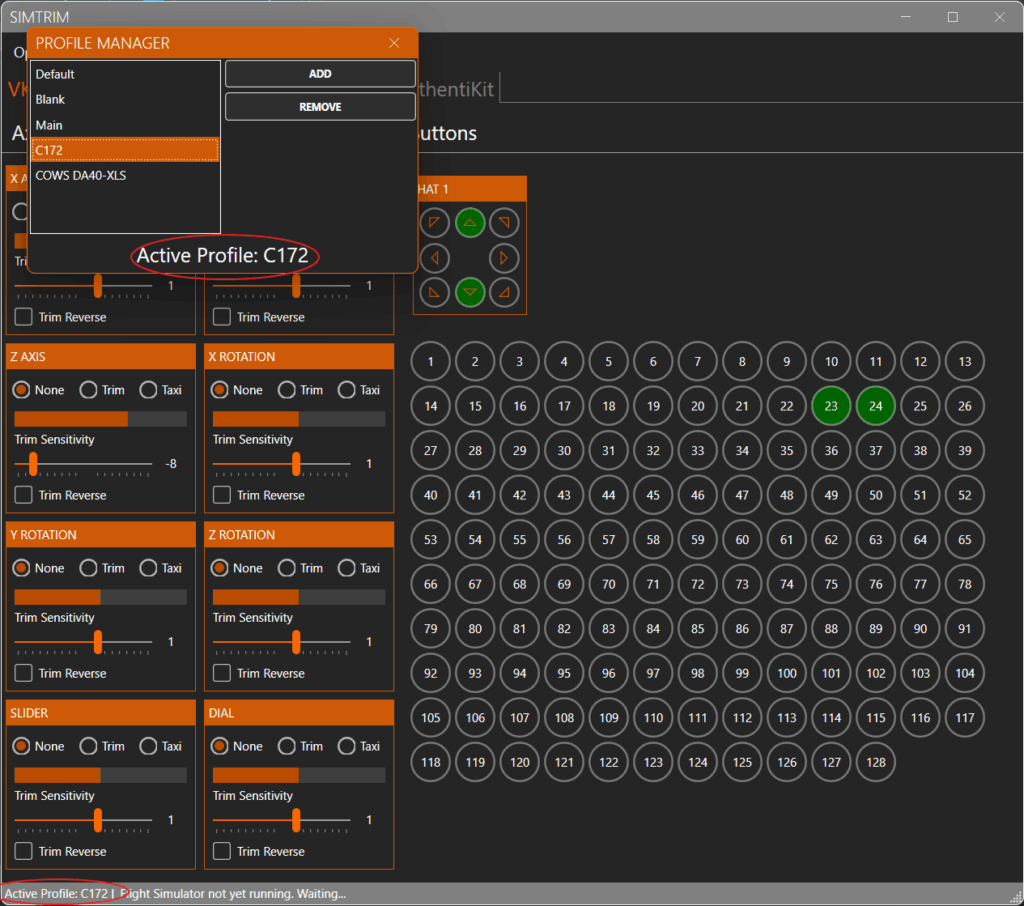
To activate a profile, first bring up the profile manager window…. Options -> Manage Profiles. Then just select the profile from the list. Here I have activated the C172 profile. As soon as I close the profile manager window, all my previous settings associated with the C172 profile will be applied.
Adding a Profile
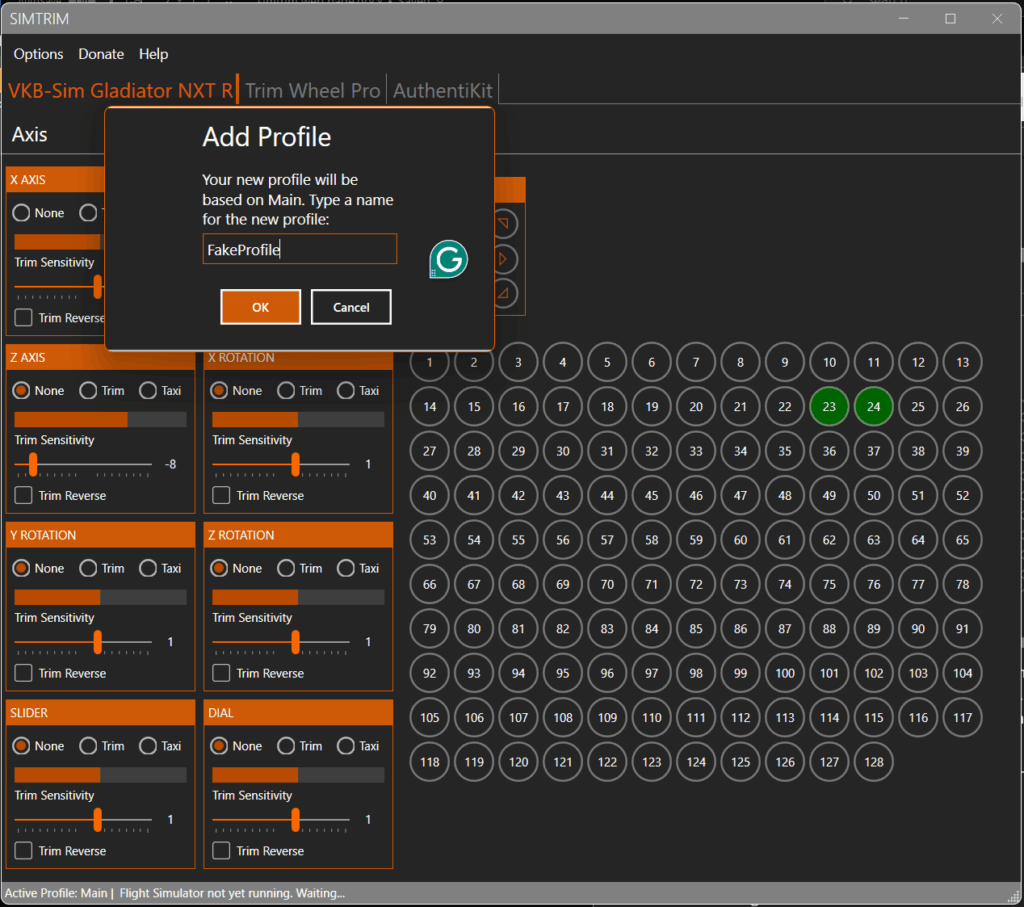
By clicking ‘Add’, we can type in a name for the profile we want to add. But, the new profile may or may not start blank. Instead, it will inherit all the settings of the previously active profile. As can be seen in the above screenshot, ‘Main’ is the currently active profile, so the new profile we are adding, ‘ FakeProfile’, will receive the same settings as ‘Main’ as a starting point. If you now just want to make very small changes to a couple of buttons in your new profile, then we don’t need to start from scratch.
Removing a Profile
For the sake of completeness, I will briefly describe how to remove a profile in the profile manager window. It’s as simple as selecting the profile you want to remove from the list and clicking on the ‘Remove’ button.
